Tag: Image Optimization

  • A Simple Mac Tool I Use to Resize Images Before Uploading to WordPress

    A Simple Mac Tool I Use to Resize Images Before Uploading to WordPress

    If you’ve ever uploaded a photo straight from your phone into WordPress, you’re not alone.

    That 6MB image looks harmless. WordPress even creates multiple sizes automatically. Everything seems fine.

    But here’s what’s actually happening behind the scenes:

    That full-size original file still lives on your server.

    And if it’s oversized, every upload adds weight to your hosting account, your backups, and your long-term site performance.

    For small businesses, nonprofits, and community organizations trying to build sustainable digital spaces, that adds up.

    So here’s the simple tool I use to prevent that problem before it starts.


    The Quiet Utility That Just Works

    On my Mac, I use XnResize.

    It’s free.
    It’s lightweight.
    It batch processes images in seconds.
    And it doesn’t try to be a full design suite.

    It does one job well: resizing images intentionally before they ever touch WordPress.

    I typically use:

    • Mode: Fit
    • Max width: 1600px
    • Keep ratio: On
    • Resample: Lanczos
    • JPEG quality: 80

    That’s it.

    No drama. No overthinking.


    A Real Example From Bloomington

    Recently, I photographed the launch event for Amplify Bloomington.
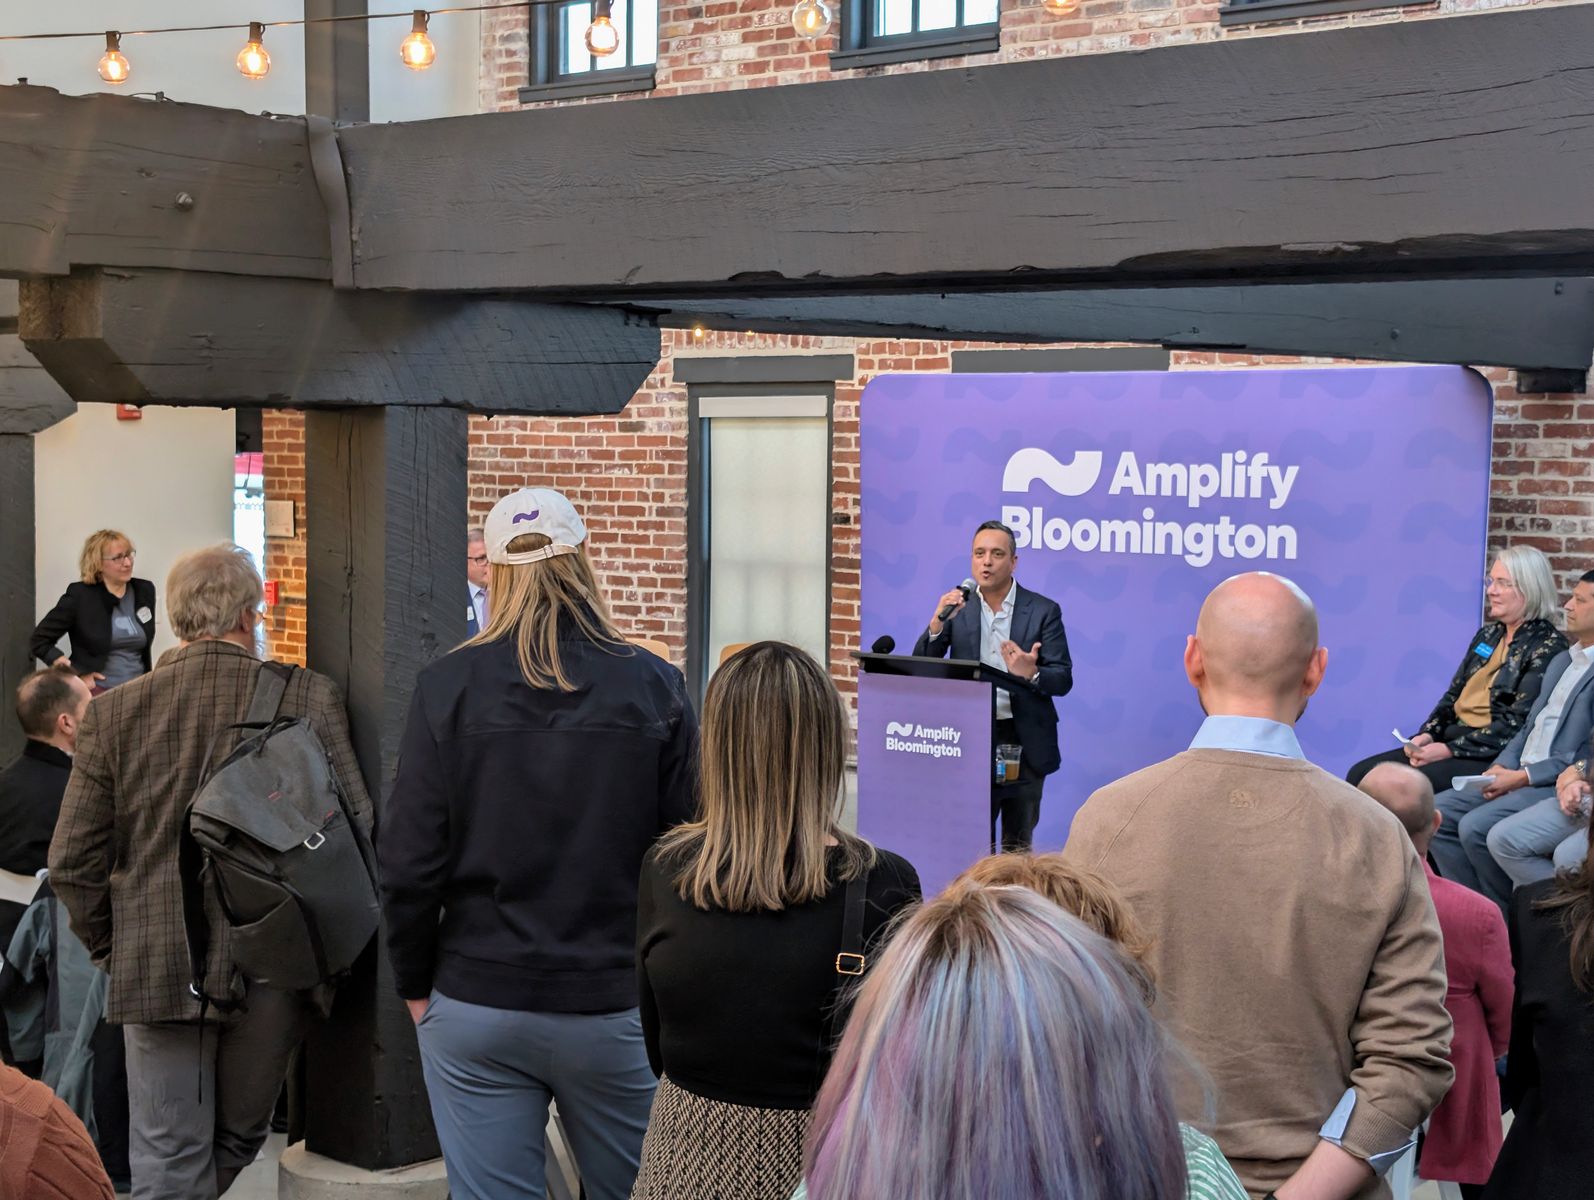
    Image URL:
    https://davidmartindesign.com/wp-content/uploads/amplify-bloomington-logo-green.png

    This was a great community moment. Brick textures, string lights, signage, faces, layered depth. A perfect real-world test for image optimization.

    The original photo from my Pixel was:

    • 7751 × 5836 pixels
    • 45.2 megapixels
    • 5.8MB file size

    Beautiful detail. Completely unnecessary for a website.

    Here’s what the file information panel looked like before resizing:

    Image URL:
    https://davidmartindesign.com/wp-content/uploads/original-photo-metadata-7751×5836-wordpress-image-optimization.jpeg

    Notice that 7751px width. No modern WordPress layout needs that much resolution. Even large hero sections rarely exceed 1920 to 2560 pixels.

    Uploading that original image would mean:

    • 5.8MB stored permanently
    • Larger backups
    • Slower media library performance
    • Increased hosting footprint

    And it adds up over time.


    How I Optimized It

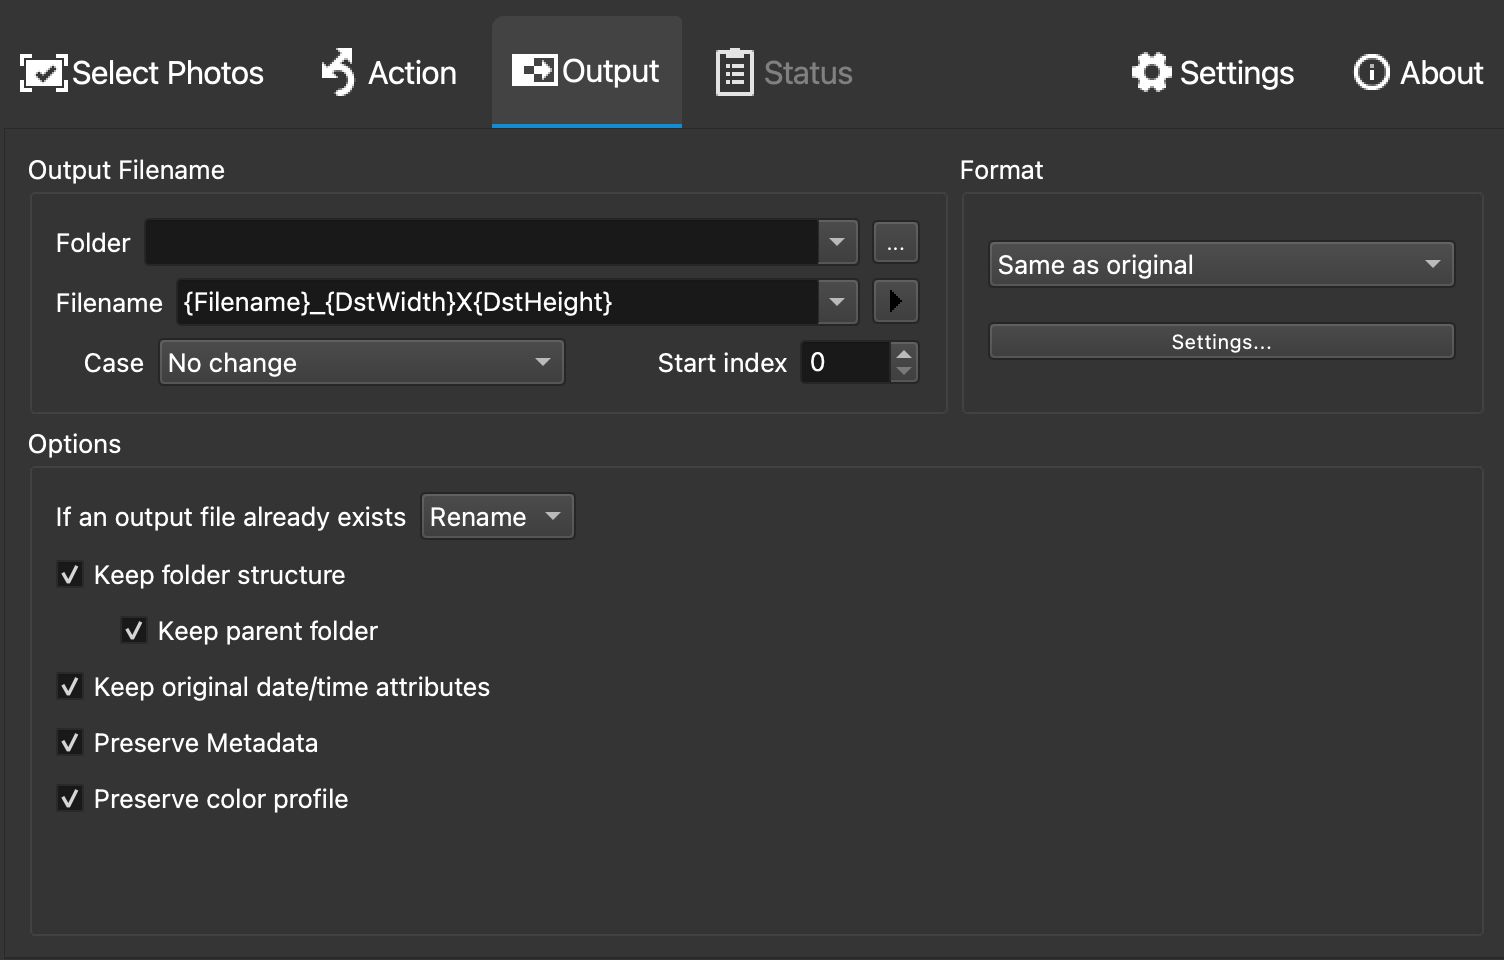
    I ran the image through XnResize using my standard preset:

    • Max width: 1600px
    • Mode: Fit
    • Lanczos resampling
    • JPEG quality: 80
    • Metadata removed
    • Color profile preserved

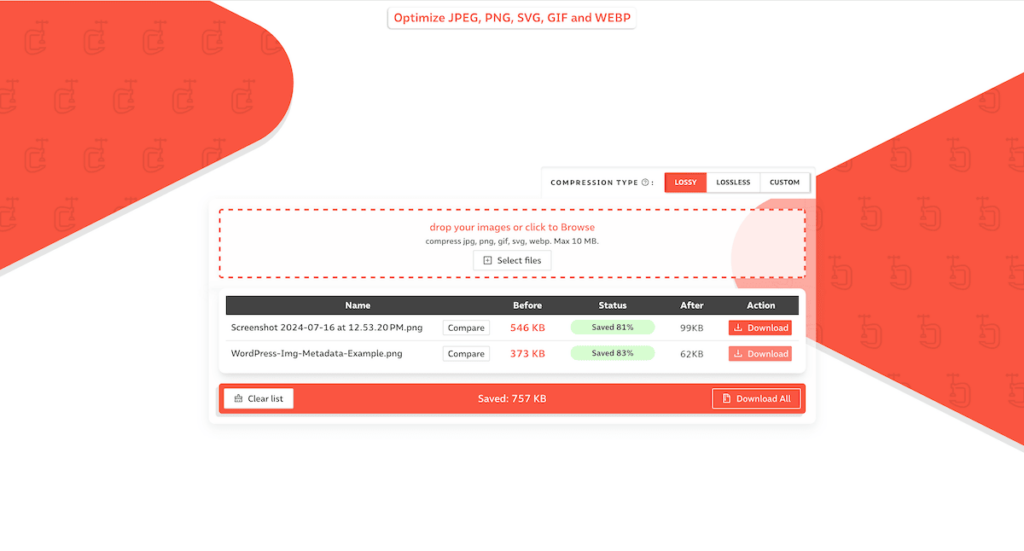
    The resulting image is approximately:

    • 1600 × 1205 pixels
    • Around 400KB

    Here’s the optimized version:

    Image URL:
    https://davidmartindesign.com/wp-content/uploads/amplify-bloomington-event-optimized-1600px.jpg

    Visually, it still looks crisp. The brick texture holds up. The lighting feels natural. The signage is clear.

    Technically, the file size dropped by more than 90 percent.

    That’s a meaningful reduction.


    Why I Don’t Just Let WordPress Handle It

    WordPress generates multiple image sizes automatically, which is great.

    But it does not shrink the original upload.

    If you upload a 7751px image, that file stays exactly that size on your server.

    Resizing before upload keeps your infrastructure lighter from the beginning.

    It’s a small habit that prevents long-term bloat.


    A Simple Workflow You Can Use

    Here’s what this looks like in practice:

    1. Export or gather your original images
    2. Drag them into XnResize
    3. Apply your preset
    4. Save to an “optimized” folder
    5. Upload to WordPress

    That extra step takes less than a minute.

    But it makes your site faster, leaner, and easier to maintain.


    A Note About Resolution and DPI

    You may have noticed the original file lists 72 DPI.

    For web use, DPI doesn’t matter.

    Pixel dimensions matter.

    A 7751px-wide image will be huge online regardless of DPI settings. What determines performance is width and file size, not print resolution metadata.


    Digital Sustainability in Small Decisions

    When we reduce a 6MB image to under 500KB without losing visible quality, we’re not just improving performance.

    We’re:

    • Reducing bandwidth usage
    • Shrinking backups
    • Lowering storage overhead
    • Making pages load faster for real people

    For nonprofits, small businesses, and community organizations, those efficiencies matter.

    Image resizing isn’t glamorous.

    But it’s one of the simplest ways to build digital spaces that are thoughtful instead of wasteful.


    Final Thoughts

    You don’t need heavy design software.
    You don’t need expensive subscriptions.
    You just need a consistent, intentional workflow.

    Tools like XnResize make that easy.

    If you’re not sure what dimensions your theme actually needs, or you’d like help building a lightweight media workflow for your site, I’m always happy to talk it through.

    Small refinements compound over time.

    And that’s where good websites become sustainable ones. 😊

  • My Custom GPTs: Elevating Workflows & Creativity

    My Custom GPTs: Elevating Workflows & Creativity

    Welcome to a showcase of my custom-built GPTs! Each of these tools is designed to solve specific challenges, enhance productivity, and support creativity in web development, digital marketing, and beyond. Click on each link to explore further and see how these unique GPTs can help you or your business.

    Custom GPT Tools by David Martin

    Summary Scribe

    Explore Summary Scribe
    Summary: Summary Scribe is your go-to for casually summarizing meetings, particularly those involving marketing campaigns, strategies, and deliverables. It excels at extracting key points, action items, and decisions while ensuring campaign details and deadlines are clearly captured. It’s a valuable tool for maintaining clarity and keeping projects on track.

    Invoice Snippet Scribe

    Explore Invoice Snippet Scribe
    Summary: Invoice Snippet Scribe distills detailed task lists into concise, under-300 character memos for invoices. This ensures that clients get clear and understandable descriptions of services rendered, enhancing transparency and making invoicing a breeze.

    Web Growth Mentor

    Explore Web Growth Mentor
    Summary: Web Growth Mentor is a friendly, data-driven virtual business coach designed to help web design professionals scale their businesses. With expertise in web design, digital marketing, and entrepreneurship, this GPT offers valuable insights into emerging trends while fostering continuous learning and growth.

    Web Proposal Planner

    Explore Web Proposal Planner
    Summary: Web Proposal Planner is an essential tool for crafting detailed, data-driven proposals for WordPress website development. By analyzing client input and conducting web scraping, this GPT helps you create structured project briefs that cover objectives, timelines, budgets, and deliverables with ease.

    Website Outline Architect

    Explore Website Outline Architect
    Summary: Website Outline Architect works seamlessly with the Yoast SEO plugin for WordPress to ensure your website’s structure is optimized for both users and search engines. This GPT guides you through the best practices for creating intuitive, responsive, and SEO-friendly websites that rank well in search results.

    Web Weaver Wizard

    Explore Web Weaver Wizard
    Summary: Web Weaver Wizard helps craft compelling project proposals tailored to your client’s business model and goals. It focuses on creating persuasive, benefits-driven proposals that resonate with clients while ensuring technical and digital marketing aspects are well addressed.

    Bloomington Content Creator

    Explore Bloomington Content Creator
    Summary: Bloomington Content Creator is your dedicated assistant for producing engaging, SEO-optimized content about the vibrant local scene in Bloomington, Indiana. From restaurant reviews to cultural events, it helps you craft posts that highlight the unique offerings of the city while adhering to SEO best practices.

    Bloomington Online Business Scout

    Explore Bloomington Online Business Scout
    Summary: Bloomington Online Business Scout generates detailed, organized business summaries based on comprehensive research. It helps users compile essential business information, from contact details to online presence, using a structured template that’s perfect for online directories and customer outreach.

    Calendar Event Wizard

    Explore Calendar Event Wizard
    Summary: Calendar Event Wizard assists in scheduling and managing events by generating iCalendar-compatible text entries. Perfect for both technical and non-technical users, this GPT ensures accurate scheduling across time zones and provides clarity in event details.

    A11y SEO Image Wizard

    Explore A11y SEO Image Wizard
    Summary: A11y SEO Image Wizard optimizes your media libraries with SEO-friendly and accessible metadata. From descriptive filenames to alt text and captions, this GPT ensures your images meet both accessibility standards and SEO best practices, enhancing both user experience and search visibility.

  • WordPress SEO for the Busy Entrepreneur: Image Optimization

    Are you trying to DIY your online presence but are struggling to understand all the search engine optimization (SEO) terms? Are you worried about causing more damage or harm than good, or overwhelmed with deciphering what practices are essential and what could be saved for a rainy day?

    Hello and welcome to the first chapter of our WordPress SEO for the Busy Entrepreneur series where we help our clients, fellow entrepreneurs, and aspiring digital marketers better understand the foundational practices of SEO for their website’s organization.

    We know the stress of trying to run a business on top of marketing it. That’s why people come to us and we have a business! (Talk about the circle of life!) But we also have many wonderful clients who aren’t at that stage of their entrepreneurial journey, who need a professional website with reliable hosting and can’t afford a marketing agency quite yet. Yet, many have a drive that knows no bounds and are more than willing to put in the work updating their website with edits and blog posts. They just don’t have the time to learn what’s important, what’s less so, what resources to trust and learn from.

    It’s become clear to us that there needs to be a resource for entrepreneurs who are willing to put in the work, but can’t afford a single moment more. For those who need the pieces broken down and targeted specifically for their WordPress site. For those who aren’t technically savvy and have no desire to be, they just want things to work and for customers to go 📈. If any of these sounds like you, you’re in the right place.

    Today, we’ll be talking about Image Optimization, why it’s important and how it plays into your institutions marketing success, and ranking each piece by what’s most important as well as the process we recommend you take for the most efficient use of your time.

    What is Image Optimization?

    Image optimization is the process of converting high quality photographs, artwork, and graphics from their original state into copies that are optimized for websites and social media platforms. This process involves two main procedures:

    1. Cropping, resizing, and saving images into a compressed format while sacrificing minimal quality
    2. Correctly categorizing and describing the images you’re using through image metadata

    Just like you wouldn’t want to wear a t-shirt that’s 5 sizes too big and claims to be “wrinkle-free” when it’s clearly not, you wouldn’t want an image on your website that takes 2 minutes to load and ends up not being what the user was looking for. The process of image optimization is like tailoring that oversized t-shirt to fit just right.

    Image Compression: Tailor Your Images to the Digital World

    Image Compression is ultimately about carefully cropping, resizing, and compressing the image file so it loads quickly and looks great on screens – without sacrificing the quality or intent of the original image.

    Image Compression can be broken down into 4 steps:

    1. Crop: Crop the image so that the main focus is centered, if needed. Consider the platform(s) you’re uploading to and whether they use a square, rectangular, or circular aspect ratio. This not only reduces the file size, but also improves it’s impact.
    2. Resize: Digital cameras today are capable of taking superb quality photographs in 4K resolution. But images on web pages or social media platforms are rarely displayed at this resolution, since most images are not displayed full screen and the majority of internet users are using devices lacking 4K output. When in doubt, a 1200px width is more than enough for the vast majority of images used on a web page.
    3. Reformat: There are plenty of image formats out there nowadays. Each come with their own benefits and drawbacks, but to keep it simple: Use .jpg for images that have a background, and .png for images that have a transparent or no background. The default quality option should be sufficient.
    4. Compress: Using a free image compressor like compressor.io can further reduce the file size of an image by up to 80% sometimes without making a noticeable impact on quality. Now would be a good time to rename your image for SEO purposes (more on that below.) If you follow nothing else in this guide, using these image compression tools are an extremely easy and straightforward way to reduce page load time.
    Screenshot of compressor.io reducing the file size of an image

    Crop & Resize Images on Windows

    1. Open File Explorer and find the image you want to edit.
    2. Right-click on the image, hover over “Open with,” and select “Photos.”
    3. Click the “Edit & Create” button in the top-right corner.
    4. Select “Edit” from the dropdown menu.
    5. Click the “Crop & rotate” button.
    6. Adjust the cropping frame by clicking and dragging the corners or edges of the frame. Once satisfied, click the “Save a copy” button to save the cropped image.
    7. Open the cropped image in Paint (right-click the image, hover over “Open with,” and select “Paint”).
    8. Click the “Resize” button in the Home tab.
    9. Ensure the “Maintain aspect ratio” checkbox is checked.
    10. In the “Horizontal” box, enter “1200” (the vertical dimension will adjust automatically). Click “OK” to resize the image.
    11. Click “File” in the top menu bar and select “Save as.” Choose the desired location and format, and click “Save.”

    Crop & Resize Images on Mac

    1. Locate your image in Finder
    2. Open the image in Preview (double click on the image)
    3. Press and drag your selection
    4. Hover on Tools in the top menu bar, select Crop
    5. Hover on Tools again, select Resize Image
    6. In the width box, put 1200px & confirm
    7. Save the image by hovering on File in the top menu bar and selecting save (or press S)

    Image Metadata: The Catalogue Card for Your Photos

    Before we delve into Image Metadata, let’s back up and ask the question: “What is Metadata?”

    Metadata defined for the laymen

    To define it simply: Metadata is data about data. It’s information that categorizes and summarizes what something is.

    To use an analogy: In the 80’s you needed to find a book (website) at the library (web). You would use the library catalogue (Google, Bing, Yahoo, etc.) to search for the book either by it’s name or author. When you found the right card (search result), it would tell you the call number or location. You would then go through the shelves or ask a librarian for help (click) and eventually find and check out your book (website).

    In our case, we use metadata describing your website to help the robots that search engines use to rank search results better understand who your organization is, what you do, when you’re open, how to contact you, etc. and ultimately rank as high as possible.

    What do I need to know about image metadata?

    Image metadata is important not only because it helps these robots understand images they can’t actually see (yet) and determine if they’re relevant or not, but also ensures your website remains accessible for those with sight disabilities or a painfully slow internet connection by providing descriptions of what they’re viewing.

    Image metadata can feel complex to understand considering all the various elements that go into it, and even harder to know what to prioritize. But luckily, the elements that have the greatest visibility impact are also some of the simplest to incorporate. Here are the three most important elements concerning image metadata:

    1. Alt Text: Alt text, short for Alternative Text, is the most important part of image metadata. This is really just a brief description of what the image is. It’s used for people who rely on screen readers, when the image fails to load to give context (common for those with slow internet connections), and for showing search engines that this image is relevant in relation to your organization.
    2. File Name: An images name before uploading it plays a huge factor in helping search engines better understand the image content and increase it’s visibility. This is a great place to tie your images with your company and it’s specific services or people. Instead of “mark.jpg”, something like “Mark-Scott-Sales-Manager-Generica-Inc.jpg” helps search engines recognize that Mark Scott is the Sales Manager at Generica Inc, this is his picture, and that this image is relevant to the blurb describing him below it.
    3. Title: The title tag is used as a tooltip description, providing supplemental information when the user hovers over an image. However, the this only applies to users on desktop. This is a good place to add keywords if warranted.

    Let’s get to work: An actionable Image Optimization checklist

    Now that we’ve explained the abstract concepts behind Image Optimization and it’s two major components: Image Compression and Image Metadata, let’s go through a step by step process on how to actually incorporate these pieces efficiently:

    1. Gather your images into a folder called something like [subject]-originals
    2. Decide where you’re uploading these images and crop each one as needed
    3. Resize the width of each image to 1200px
    4. Reformat each image. Are they photographs? Go with .JPG. Are they graphics or use transparent backgrounds? .PNG is the way to go
    5. Create a folder called [subject]-optimized and upload your edited images to compressor.io
    6. Download each image, saving it into the [subject]-optimized folder and rename each image to relate to your organization and the relevent service or person
    7. If you want a break, now’s a good time
    8. Login to your WordPress website, and navigate to the Media tab in the admin panel
    9. Upload your optimized images
    10. Return to the media library, click on the first image thumbnail in the upper left. This will open the image metadata panel. In the alt field, write a brief description of the image in question either manually or use AI to assist you. If you have a premium ChatGPT plan, use our A11y SEO Image Wizard.
    11. Fill out the alt text (and optionally the title) for the remaining images. Congratulations! You’ve now optimized the images on your website. Your images can be now be added to the posts or pages of your choosing.

    If you followed this checklist, you can rest easy that the most important standards concerning image optimization are being met. Your web page will now appear more attractive to search engines, as well as improve the page load times and accessibility for your visitors.